Pages

0 [ATRIX2] Rebel Rom For ATRIX 2

Monday 30 April 2012


Features
Deodexed
Zipaligned
Stock Theme ATM
1% Battery mod
0vermind Speedy script
Pull down notification settings
Removed carrier name
Extended power menu
ICS themed Xperia launcher
ICS Icons for Browser,Messaging,and contacts.
Build.prop tweaks
Debloated
MIUI Root access File manager (thanks apooonet)
AOSP apps replaced Browser, music and messaging
Droid Razr bootanimation
OCed to 1122 mhz http://code.google.com/p/opptimizer/


Bugs:
Calender Not Syncing 
GPS Not Working


How to install:
Put .zip on sdcard
Make CWM Backup, just in case
Wipe cache,and dalvik cache
Flash zip in CWM


Recommended install to avoid problems (will wipe all data) may not be needed if on 2.3.6 base
Put zip on sdcard
Back Up apps with Titanium backup
Make CWM backup
Wipe DATA,Cache and dalvik cache
flash zip


0 [Defy Rom]JBoogie3 Blurry Ginger


Features:
-lcd density changed
-Removed bloat and some blur stuff
-busybox
-bootmenu
-Deodexed and optimized
-build.prop hacks for performance
-Spare parts
-Adlx stats
- more stuff to write

How to install

- Go to custom recovery
- Full wipe (data/cache/dalvik)
- Restore nandroid backup (sdcard/clockworkmod/backup)
- Enter bootloader
- Flash fixed SBF
- Wipe with stock recovery
- Done

Download ROM

0 Motorola Razr XT910 Gudies

Got a Razr Still Figuring Out How To Mod It Then Follow This Video Guides By My Friend


0 CM7 ICS MOD 3 For ATRIX 4G


The rom is based on the latest version of CM7, modified and optimized, it is not CM9 ICS.

Change Log


BETA 1
Base CM7
The fingerprint reader works
Removed ADW Launcher
Go Launcher Added ICS themed.
Integrated Battery Calibrator (calibrate the battery after installing the rom)
Wallpaper Set & Save Integrated (to put wallpaper in full size without trim or stretch)
New Version 3.0.7 Superuser
3.3.11 New Market
System optimized for greater fluidity and better transitions.
Transitions and Animations ICS (having GoLauncher unfortunately can not be appreciated but if you install another launcher are going to see better).
Kernell of Faux123 v0.22 (source newer, better memory management, battery and many more improvements)
OC Stock
Modified System Applications with ICS interface and icons (Calendar, Marking, Contacts, Email, keyboard, settings, music player, etc)
Nexus Galaxy Bootlogo
Sounds of ICS
Removed Rom Manager, was replaced by RomToolbox as it contains many more functions such as root all together explorer, titanium, etc..
New version of Superuser
Unlock new interface
And more ...


BETA 2
Installing the system faster
Speed ​​up boot
All animations integrated ICS
New Source ICS
Live Wallpapers ICS
ICS clock
ICS wallpapers
New ICS Launcher integrated
Optimized memory consumption
3.3.12 New Market

BETA 3
New Base CM7 December 10 (fingerprint reader configuration settings and other improvements in their own version of the new CM7)
Modified google applications come with their own facility to keep the CM policy not to include in your system (applications were updated and modified some, it is recommended to use the pack including the rom)
Fixed problems with some languages ​​such as Korean
Source ICS (Robot) default
Fixed audio problem on the keyboard, camera and screen interaction
Kernell of default CM7 (faux123 can uses it without problems)
New Music Player 4.01 default ICS
Removed GenieWidget
Added error reporting CM7 (it may be helpful for developers to correct for problems in the version)
More stable system

Installation and Configuration
Perform the appropriate wipes
Download and unzip the zip
Copy the folder CM7-ICS-MOD3 within ClockworkMod/backup and restore by nandroid
Install the zip of the GoogleApps
Reboot. In case you do not start out and put the battery before trying something else


Credits To:evogp@XDA


0 Official CyanogeMod for Cliq/Dext

Want To Install Cyanogen Mod in your Cliq Lets follow this 


What working with this build :
CPU scaling in CM settings. (Smartass, lag free,interactive governors added. OCed to 768 Mhz)
Improved battery
Keyboard Backlight (Now works with light sensors) Amazing job @dwagner and @JassyCliq
Calls 
Data
FM radio
WiFi
Bluetooth (To play music effortlessly through Bluetooth download BTmono from Market)
Speaker phone
GPS
Camera
Camcorder 
SD Card
USB (If you have trouble syncing SD Card to PC. Unplug cable and plug it back in)
Proximity
Compass
Sound
Barcode scanning
Reboot to recovery
SYM Key
HQ YouTube playback
USB tether on Linux OS
Much, much more


First Time Install:
Download the the latest recovery using Rom Manager
Download latest update: Download Link
Download super-wipe.zip: Super-Wipe.zip
Put both on the root of your SD card.
Boot to your recovery
Flash super-wipe.zip first
Wipe data/factory reset
Flash latest update
Fix permissions
Reboot.
After boot let it settle for 10 minutes.
Open Rom Manager.
Press menu and select manual flash override and ok. Select Motorola Cliq then clockworkmod 3.x
Go to "Download ROM>Google Apps
Download latest Google Apps (top)
After download a window will pop up.
Leave Wipe Dalvik checked. I recommend Backup as well.
The rest will be automated assuming you flashed ClockworkMod Recovery
Updating from previous build


SD card update
Download latest update: CyanogenMod Mirror Network - Powered by TDRevolution
Place it on the root of your SD for simplicity.
Open Rom Manager (Be sure to have the latest CWM recovery)
Select "Install ROM from SD Card 
Select the latest nightly
A window will pop up. Leave "Wipe Dalvik" checked
Put a check next to Backup Current ROM
Let your phone reboot and the rest is automated.
When finished booting, open Rom Manager and install the latest Gapps again
Just Wipe Dalvik
Reboot and enjoy

Credits to @JassyCliq @M3
Download Latest Version Of Cyanogen Mod  HERE


warning im not responsible bricking your Cliq/Dext..

0 Rooting Motorola Cliq and Dext Safe Method


Setup:
- Install adb unless you haven't done so (here) and Motorola drivers unless you haven't done so (here)
- Download attached archive
- Extract to a directory, I used c:\Moto_MSM_Root
- Make sure you have USB degugging enabled
- Change connection to PC Mode (Charge Only)


Process:
- Open command prompt
- cd c:wherever-your-sdk-tools-folder-is
- adb devices (to verify the connection)
- adb push c:\Moto_MSM_Root\Superuser.apk /sdcard/Superuser.apk
- adb push c:\Moto_MSM_Root\su /sdcard/su
- adb push c:\Moto_MSM_Root\rageagainstthecage-arm5.bin /data/local/tmp/rageagainstthecage-arm5.bin
- adb push c:\Moto_MSM_Root\install-root.sh /data/local/tmp/install-root.sh
- adb shell
- cd /data/local/tmp
- chmod 0755 rageagainstthecage-arm5.bin
- chmod 0755 install-root.sh
-> keep your phone connected to PC


-> open the terminal emulator on the phone and type:
- cd /data/local/tmp
- ./rageagainstthecage-arm5.bin


[+] Forked xxxx childs.

Wait until you see this message

Then press enter and type "exit" to close the terminal (or close it via the menu)

-> open the Terminal Emulator or ConnectBot on the phone (if you get the message that terminal died, dismiss it and run it again)


If you end up with "#" prompt, do the following. Otherwise reboot the phone and try opening the "Terminal Emulator" again. If even that doesn't give "#" prompt, go back to step "./rageagainstthecage-arm5.bin". There are mixed results atm., but some succeeded. See this post for possible way:

Type into the console:
- /data/local/tmp/install-root.sh
(if the script prints nothing, then it was successful)
- exit
- exit

Now you have successfully rooted the phone.

The install-root.sh contains the following:

Code:
mount -o rw,remount /dev/block/mtdblock1 /system

cat /sdcard/su > /system/xbin/su
chown root.root /system/xbin/su
chmod 6755 /system/xbin/su
cat /sdcard/Superuser.apk > /system/app/Superuser.apk
chown root.root /system/app/Superuser.apk
chmod 644 /system/app/Superuser.apk

mount -o ro,remount /dev/block/mtdblock1 /system

All Credits goes to skrilax_cz@M3  And C-Skills 

0 Webtop Via HDMI Without a Dock!!

Installation  Procedure:


STEP 1. installing Through ADB 


Download The Atrix WebTop Mod HERE

First Get the files to the device and remount /system as rw:


You can do this using Root Explorer or any other file manager


adb push DockService.apk /mnt/sdcard/
adb push PortalApp.apk /mnt/sdcard/
adb shell
su
mount -o remount,rw /dev/block/system /system


 And Backup The Original Files


mv /system/app/DockService.odex /system/app/DockService.odex.bak
mv /system/app/PortalApp.odex /system/app/PortalApp.odex.bak
cp /system/app/DockService.apk /system/app/DockService.apk.bak
cp /system/app/PortalApp.apk /system/app/PortalApp.apk.bak


Copy The Modded Files over fix Permissions And Reboot:


cp /mnt/sdcard/DockService.apk /system/app
cp /mnt/sdcard/PortalApp.apk /system/app
chmod 644 /system/app/DockService.apk
chmod 644 /system/app/PortalApp.apk
reboot


Now it's done you are enabled Webtop Via HDMI Without a Dock.


Warning:im not responsible for bricking your phone 


Happy Modding.


0 CWM Touch Recovery For Motorola Razr XT910

Sunday 29 April 2012
How to install This Touch Based Clock Work Mod Recovery in Your Razr XT910


Installation in Your Razr XT910
1. Download (Update_RAZR_CWMRecovery_TouchOnly_J.Y.Daddy_12.02 .21.zip)
2. File copy at SDcard.
3. Recovery boot on your razr.
4. in recovery menu: "install zip from sdcard" -> "choose zip from sdcard" -> select file.
5. After update completed, reboot.
6. After reboot completed, recovery boot again. 
You will see the new touchable recovery screen!


Don't Like it Want to Roll Back?


Re-install Bootstrap.apk.
If you using "Motomizer Expert Edition", you can use "Recovery Install" menu.


Credits to J.Y.Daddy@XDA


Download CWM Touch Recovery


0 WhiteRabbit Edition 1.5.1 AROMA INSTALLER


                                                       .:FEATURES:.
based on CM7 Kang 14.04 / Quarx 08.04
Now also with Motorola Bravo Version
With Aroma Installer and Touch Support
Aroma Installer in 6 languages available
WIFI PowerSave / Zipalign / Juve's Ram Mod
Different Wifi + GPS Settings ( optional )
VSuite Voice Dealer ( ICS port from Maniac103 )
V6 SuperCharger Script Update 9 RC8.2
Beats Audio Support
Defy+ Battery Support
Bravia Engine Mod
Pdroid Support
Update Me App with a lot of Options
SmoothScroll and VolumeIncrease Tweak
Media Sound Folder is created on SD Card ( thx maniac103 )
extra Soundfiles / Bootanimation
DNS set to Google Server ( SetDNS not needed )
CPU Settings a little bit untervolted
ICS Standard Font
ICS or CM7 Bootanimation
ICS Transition and Screen Rotation
AppWidgetPicker
Rom Toolbox ( optional )
Google Apps ( optional )
GoLauncher Ex with NewMIUI Theme
Second Boot Settings ( everything is set perfectly after the second boot )
Custom Recovery 5.0.6
Miui Explorer Port
Google Play Store and Music
Hacked Google Market
NewMIUI GoLauncher Theme and CM7 Theme
Updated Google Apps
DSP Manager and STK ( optional ) )
APN List and Adfree Host File
Motorola Apps ( optional )
MIUI Ports and alternatives ( optional )
build.prop Tweaks and Fingerprint set to MB526
and some other stuff


Just Boot Into Recovery and The Select Whiterabbit ZIP File and then leave it it will do the rest installation :D


DOWNLOAD 1.5.1

Credits to TweetyPeety@XDA

0 Defy Stock Roms

Bricked Your Defy?lets unbrick it By Flashing Stock Rom...


What you Need to unbrick 


Ofcourse a Defy :)


RSD LIte


Usb Drivers 32&64 Bit


A Micro USB Cable


T-Mobile Version HERE

Claro Brasil HERE

Retail Asian HERE

Will Update More Stock Roms Keep Looking

0 Install double boot CM7 + CM9 In Your Defy

Want to Use Two Roms now it's possbile you can set up dual boot just like pc in your defy too.


First i would recommend to backup your defy before doing any thing and i dont take any responsibility..


First u need to use m11kkaa's See Here Mulit Boot

Download The ICS version From Epyslon Build For your Defy


place all zips in your SD-Card 

Download 3filesystem images that will be your virtual partitions for CM9 on Sdcard: 
www.mediafire.com/?vvkmy2tx4yeg32m 
extract them, and place all 3 of them under /multiboot/CM9 in SDcard


DO NEVER WIPE DATA DURING PROCESS, IT IS NOT NEEDED


1) Go into Bootmenu
2) Choose "recovery ->" to go to the recovery choice menu
3) MAKE SURE you have:
"Custom Recovery" OR "Latest Recovery"
"Stable Recovery"
"Stock Recovery"


4) Choose "Stable Recovery"
6) Install Zip from SD-Card: multiboot_vXXXX.zip
7) REBOOT SYSTEM NOW
8) When you get the blue led, press Vol. Down, you will be in the Bootmenu. Boot into 2nd-boot. After a quick reboot you'll end up in the multiboot menu, and then choose the "Recovery(CWM)" Option.
9) Choose CM9 (or whatever you called it), so that things you do in the recovery will apply to that precise virtual system.


9) a) Install zip from sdcard: CM9!!! =D
9)b) (OPTIONNAL): install google apps
10) Wipe cache and dalvik cache and then reboot system.
11) On blue LED, go to bootmenu (vol down), choose boot -> 2nd Boot, then after a few seconds (a reboot) the virtual rom you want to launch


Boot order Select as you Like


Boot->2nd init is to launch your main ROM (CM7)
recovery -> Stable recovery is for your main ROM (CM7)


Boot ->2nd boot is for the CM9 rom on sdcard
recovery-> custom recovery is for CM9


Done!Now you Have installed Double boot in your defy...:) 


1 How to get Reboot Option In Power Menu in Atrix 2

Looking To Get Reboot Option In Power Menu Follow The Guide  Below


Credits To  JRW 28@XDA


nstructions:
 Boot into CWM using bootstrap
Wipe Cache
Install Zip from SD card
Choose Zip from SD card
Select the Zip file
Install Zip file
Reboot system
Patiently wait and your boot animation as it takes the phone a few extra minutes to boot.


Download The File

2 MIUI.US V4 Rom For ATRIX

What are Working In this Rom


ICS v4.0.4
Calls and SMS and Data
Display
Touchscreen
Proximity Sensor
WiFi
Audio
Bluetooth
GPS
Camera landscape and Portrait
Hard Keys Lights
ScreenCap
4 way lock-screen
MMS
Miui Torch
Usb Mount via default sdcard
Reboot/Shutdown options
Voice Search
Volume Rocker
APN menu
Face Unlock 
browser 
OTA (updater)
Themes 


Not Working


On Animation
Camcorder
Fingerprint sensor (not native to MIUI)
Webtop(not native to MIUI)
Music player online music
Leds Colours


How to install This Rom


This rom with Aroma installer Touch Based installer Just select zip and then wait few seconds now aroma installer will start it's job and your done Reboot your Phone and Enjoy MIUI.US ICS In your Atrix Feel The Dual Core Power...:)


0 How to Root Motorola Milestone

Want to Root Your Milestone a.k.a Original First Droid Then Follow The Steps Mentioned Below 


Warning: Please follow this guide at your own risk. MOTO4U will not be liable if your device gets damaged or bricked during the process.


Requirements 


Download and Install Motorola USB Drivers
Download And Install RSD Lite Older or Newer Version
Vulnerable Recovery SBF  with Bootloader RAMDLD 90.78 and lower.
Milestone Root Update.zip


Instructions:


Install the USB Drivers on the your PC.
Plug your phone into the PC via USB Cable, let windows install and detect any internal devices on the Milestone.
Rename ‘milestone_root.zip’ to ‘update.zip’ and copy it on the root of your SD card.
Disconnect the phone, run RSDLite 4.6 on your PC , and connect the phone again. If you pull down the status bar and tap on ‘Select to manage your USB Connection’, you will see that the Milestone is now connected on Portals & Tools. If any other Motorola applications start off, ignore and exit them.
RDSLite will show your phone model number ‘A853’ and the status should be ‘Connected’.
Press ‘…’ button to browse for the ‘vulnerable_recovery_only_RAMDLD90_78.sbf’ and load it.
The ‘Start’ button would now be enabled. Please ensure the USB connection is secure and start the flash.
Keep an eye on the status bar, the Milestone will reboot into bootloader, flash the recovery firmware and start back up into RSD Lite showing a ‘Finished’ or ‘PASS’ status.
Exit RSDLite phone. Press and Hold the ‘X’ button on the device and press the Power buttoand Remove the USB Connection
Power off your n, keep them help until the phone boots into recovery.(screen will show an exclamation mark inside a triangle)
Press and hold the Volume Up button and now press the Camera button to go into Android System Recovery.
You would be presented with four menu options. Scroll down to ‘Apply Update:update.zip’ using the D-pad and the golden key to enter.
Wait for the process to complete and select ‘Reboot System’ to let the phone boot back into Android.


it's a bit of Difficulty if u follow the guide carefully u can root your milestone easily


Congrats now you are rooted Milestone


Enjoy!

0 How to Hard Reset Your Motorola Defy


1. Turn the power off. take out the battery and reinsert it.
2. Hold the Volume Down button
3. Press and hold the Power button until the device turns on


Ok.Now you u"ll see a little Droid With Exclamatory Mark


4. From the menu: Fastbook, Recovery, Clear Storage, and Simlock
5. Select Clear Storage by pressing the Volume Down button
6. Press and release the Power button
7. Press Volume Up for YES and Volume Down for NO or press the touch 


Then Select Restore to factory default now it's done your Phone is  being restarted u may need to login to the MOTOBLUR


0 How To Root Droid 3 with 1 Click

Saturday 28 April 2012

1. Make sure you have Motorola drivers installed - 
2. Download and unzip 'Droid 3 easy root script' - Latest Here
3. On your phone: Settings > Applications > Development > USB debugging(check box)
4. Plug phone into computer and select "Charge Only" mode
5. Navigate to 'Droid 3 easy root' folder and run 'Click to root your Droid 3.bat'
6. Now just follow the instructions in the command window and unlock the phone after each reboot.


Now your droid 3 Rooted

0 Multi Boot Manager For Defy

Want to Run Many Roms in your Defy Then now you can run number of roms in your defy By Using Multi Boot Manager App


Reqirements
===========
1) Rooted Motorola Defy/Defy+/Bravo with 2nd init bootmenu installed
2) Multiboot feature by m11kkaa 0.51


Features
========
* Supports any number of ROMs
* Full support for multiboot 0.51
* Support multiple fsimages
* Create, recycle and format virtual systems.
* Delete, rename and edit description of each entry.
* Shows size of the VFS.
* Much more..


What is this For?
=============
A manager for Virtual File Systems (fsimages) in your sdcard.


How to use this?
================
1) First of all a custom ROM should be installed as base. Preferably the latest CM9/CM7 nightly to get the latest 2nd-init bootmenu.
2) Then flash defy_multiboot_v0.5.1.zip by m11kkaa.
3) Install  MultiBootManagerFree From Here
4) Now open Mult Boot Manager from app drawer. Create new VFS from options. You can see now the new VFS listed. You just created your first VFS.
5) If you need MBM to detect your already existing VFS folders. You have to move them to /mnt/sdcard/multiboot.
6) Instructions for using multiboot 0.51 here, thanks joydeep1985.
7) If you have coming from leodfs multiboot, you have to restart from step 1. I hope you have enough knowledge to figure out which steps to skip.
8) Rest of the options in MultiBootManager are pretty self explanatory. Please make use of the context menu(long click menu).
9) Please report bugs and any features you want. I'm bit busy now but I'll fix/implement them later.
10) This app now works in virtual system also. 
11) This app will work on all GB and ICS ROMs with 2nd init.


0 MOTOBLUR Launcher For ICS

Want to Use MOTOBLUR Launcher Now you can give a try but your Should Running On ICS 4.0


Just install The APK HERE

0 Get ICS 4.0 in Your Defy and Defy+

Want to Use ICS 4.0 Then install  Custom Rom Like Cyanogen Mod 9 it's Pretty God rom With ICS

You Can install ICS 4.0 in Defy and Defy+ Also

For Froyo (Defy) and GB Kernels (Defy+) Defy also With Red Lens

Download for Defy Froyo kernel:http://defy.wdscript.fr/defy-cm9/
Download for Defy+/Defy GB Kernel:http://defy-cm.net/defy_plus-cm9-nightly/


U need to install GAPPS Separately  "GAPPS"

CM7 (froyo) Kernel HERE
CM9 (gb) Kernel HERE

How to install 

For Defy+

1:Go Stable Recovery from boot menu
2:Wipe Data 
3:Install Zip from SD
4:Select ur ICS(DefyPlus) zip
5:FLash
6:Flash CM9 Kernel
7:Flash Gapps zip(On first page of ICS DeV thread)
8:Clear Cache and Dalvik Cache

For Defy 


1:Head Over To Stable recovery
2:Wipe Data
3:Install ZIp from SD Card
4:Select ICS(Defy) .zip
5:Flash
6:Flash CM7 Kernel
7:Clear Cache and Dalvik Cache


Done Now you are installed ICS 4.0 in Your Defy


Normally first boot will take some time But after that your phone will boot faster 


Warning!im not responsible For Bricking Your Defy Or Defy+ ...

0 How to root Motorola Photon 4G

Step 1 Install USB Drivers According to Your System 32 Bit Or 64 Bit
Step 2 Download and extract the .zip file of Motorola One Click root tool 
Step 3 On your phone go to Settings >> Applications >> Development >> check mark the USB Debugging to enable it.
Step 4 Plug in your phone to computer in “Charge Only” mode.
Step 5  On your computer, go to the folder where you extracted Motorola One Click root tool and run MotorolaOneClickRoot.exe.
Step 6 Now simply follow on-screen instruction to root your Photon 4G.


Now your Photon 4G Has Been Rooted 


Download OneClickRootTool

0 How to Root the DROID2

Looking To Root Your Droid 2 Follow The Simple Instructions Here


First Download MotorolaOneClickRoot

After Then Follow The Installation For Rooting Process:


1.  Make sure you have Motorola drivers installed - [32Bit]||[64Bit]
2.  Download the MotorolaOneClickRoot.zip file from above and unzip it to your Windows PC.
3.  On your phone go into  Settings>Applications>Development and check the box for USB Debugging.
4.  Plug phone into your computer and select “Charge Only” mode.
5.  Navigate to MotorolaOneClickRoot folder and run MotorolaOneClickRoot.exe.
6.  Follow the instructions in the command window.
7.  Your phone will complete 3 steps, rebooting along the way.  When it finishes, you will be rooted.


Now your Droid 2 Has Been Rooted This Method Applies to DroidX2 Droid X Droid 3 Which are running on Ginger Bread..

1 Enable MotoBlur in Non Blur Defy

If u are in india  Motorola Not Released MOTOBLUR With Defy. B But We Can Enable it by some Modifications

Make Sure you are rooted
install Root Explorer
backup your original build.prop File
Replace the build.prop with modified one
Go to settings>>Privacy>>Factory Reset

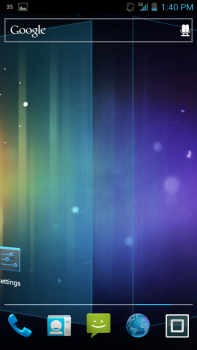
On Reboot u"ll get Blurred Defy


# begin build properties
# autogenerated by buildinfo.sh
ro.build.id=JEM_3.4.3-36-1.7
ro.build.display.id=JEM_3.4.3-36-1.7
ro.build.version.incremental=1307424561
ro.build.version.sdk=8
ro.build.version.codename=REL
ro.build.version.release=2.2.2
ro.build.date=Tue Jun  7 09:59:13 CST 2011
ro.build.date.utc=1307411953
ro.build.type=user
ro.build.user=fdc376
ro.build.host=zch68lnxdroid12
ro.build.tags=release-keys
ro.product.model=MB525
ro.product.brand=MOTO
ro.product.name=MB525_RTINT15
ro.product.device=umts_jordan
ro.product.board=jordan
ro.product.cpu.abi=armeabi-v7a
ro.product.cpu.abi2=armeabi
ro.product.manufacturer=motorola
ro.product.locale.language=en
ro.product.locale.region=GB
ro.wifi.channels=
ro.board.platform=omap3
# ro.build.product is obsolete; use ro.product.device
ro.build.product=jordan_emara
# Do not try to parse ro.build.description or .fingerprint
ro.build.description=umts_jordan-user 2.2.2 JEM_3.4.3-36-1.7 release-keys
ro.build.fingerprint=MOTO/MB525_RTINT15/umts_jordan/jordan:2.2.2/JEM_3.4.3-36-1.7/1307424561:user/release-keys
# end build properties

#
# system.prop for UMTS Jordan
#
rild.libpath=/system/lib/librilswitch.so
rilswitch.vendorlibpath=/system/lib/libril-moto-umts-1.so
rilswitch.ganlibpath=/system/lib/libganril.so
rild.libargs=-d /dev/ttyS0
ro.sf.lcd_density=240
ro.default_usb_mode=0

# wlan interface
wifi.interface = tiwlan0

# Time between scans in seconds. Keep it high to minimize battery drain.
# This only affects the case in which there are remembered access points,
# but none are in range.
wifi.supplicant_scan_interval = 45

# The OpenGL ES API level that is natively supported by this device.
# This is a 16.16 fixed point number
ro.opengles.version = 131072

# This is a high density device with more memory, so larger vm heaps for it.
dalvik.vm.heapsize=30m

# System property for SMC
ro.service.start.smc=1

#proximit sensor screen off delay
mot.proximity.delay=450

#proximit sensor disable touch distance
mot.proximity.distance=60

#doesn't use Java DNS cache. Use only bionic cache.
networkaddress.cache.ttl=0

# BEGIN Motorola, drmn68, 13-July-2010, IKSTABLEONE-729
# true when phone launches UI successfully, default is flase
sys.mot.ui.launched=false
# END IKSTABLEONE-729

# BEGIN Motorola, wlss01, 15-Sept-2010, IKNAMERCOM-2241
# Port IKSTABLETWO-7241 Master clear is taking more then 30 minutes
ro.mot.master_clear.shredsd = false
# END IKNAMERCOM-2241

# BEGIN IKJORDANFR-65 Motorola, fpx478, default Mobile Hotspot is on
ro.mot.mynet=true
# END IKJORDANFR-65

# IKJORDAN-3341
windowsmgr.max_events_per_sec=70

#IKSHADOW-4638
# This defines the min duration between two pointer event in ms
ro.min_pointer_dur=10
# BEGIN, Motorola, qwp843, 12/06/2010, IKJRDNEM-3696
# Handle No audible indication while capturing photos in silent mode
# The property "ro.camera.sound.forced" is defined by google.
# Use "ro.camera.sound.forced" to decide whether camera shutter tone is forced: 1 forced; 0 not-forced.
ro.camera.sound.forced=0
# END IKJRDNEM-3696
# 33830, 33925, 33926. Terminal Download Feature. T-Mo Url
ro.mot.portal.url=http://home.web2go.com/

#vvm activity log and dialer.
ro.mot.vvm_enable=0
ro.mot.vvm_editable=1

#IKMAP-7365 BatteryManager: Wi-Fi control to be made flexible
ro.mot.battmanager.wifictrl=0

#IKJORDAN-1087(IKBASIL-804) use new generic UA profile
ro.mot.hw.uaprof=http://uaprof.motorola.com/phoneconfig/MotoMB525/profile/MotoMB525.rdf
ro.mot.fid.34081.enable=false

#IKJRDNEMFR-14 extract artwork from ID3V2 box for 3gp files
ro.mot.id3v2.artwork.enable=true

#
# ADDITIONAL_BUILD_PROPERTIES
#
gsm.sim.mot.simswap=1
ro.config.ringtone=EtherShake.ogg
ro.mot.hw.ringerswitch=0
ro.config.notification_sound=OnTheHunt.ogg
ro.config.alarm_alert=Alarm_Classic.ogg
media.stagefright.enable-player=false
media.stagefright.enable-meta=false
media.stagefright.enable-scan=false
media.stagefright.enable-http=false
ro.default_usb_mode=0
ro.com.google.gmsversion=2.2_r10
ro.media.camcorder.vga=3gp,h264,24,4000000,aac,96000,44100,2
ro.media.camcorder.cif=3gp,h264,24,1500000,aac,96000,44100,2
ro.media.camcorder.qvga=3gp,h264,15,500000,aac,32000,16000,2
ro.media.camcorder.mms=3gp,h264,15,128000,amrnb,12200,8000,1
ro.media.camcorder.mmsres=qvga
ro.media.enc.aud.fileformat=amr
ro.media.enc.aud.codec=amrnb
ro.media.enc.aud.bps=12200
ro.media.enc.aud.ch=1
ro.media.enc.aud.hz=8000
ro.media.capture.maxres=5m
ro.media.capture.flash=led
ro.media.capture.classification=classH
ro.media.capture.flip=horizontalandvertical
ro.media.capture.flashIntensity=41
ro.media.capture.torchIntensity=25
ro.media.capture.shuttertone=1
ro.media.capture.panorama=0
ro.media.camerapreview.reg=480x360
ro.media.camerapreview.wide=848x480
ro.camcorder.VideoModes=false
ro.camera.DynamicFocus=false
ro.mot.deblur=false
ro.blur.setupprovider.tmo=false
ro.blur.setup.silent=false
ro.com.motorola.smartsensor=true
ro.mot.setuptype=1
ro.vf360_features.enabled=false
ro.blur_carrier_vodafone=false
ro.blur_carrier_tmo=false
ro.setupwizard.mode=DISABLED
net.bt.name=Android
dalvik.vm.stack-trace-file=/data/anr/traces.txt
ro.mot.dpmext=true
ro.build.svn=58
ro.mot.hw.crystaltalk=1
ro.com.google.clientid=android-motorola
ro.url.legal=http://www.google.com/intl/%s/mobile/android/basic/phone-legal.html
ro.url.legal.android_privacy=http://www.google.com/intl/%s/mobile/android/basic/privacy.html
ro.build.version.full=Blur_Version.34.177.3.MB525.Retail.en.GB

ro.com.google.clientidbase.am=android-motorola
ro.com.google.clientidbase=android-motorola
ro.com.google.clientidbase.gmm=android-motorola
ro.com.google.clientidbase.yt=android-motorola
ro.com.google.locationfeatures=1
ro.com.google.clientidbase.ms=android-motorola
Enable it your own risk

3 Enable HDMI Mirroring In ATRIX 4G

Installation Steps For Enabling HDMI Mirroring

1)Make Sure your phone is Rooted

And Then Install This APK:- HDMI Mirroring

It's Done HDMI Mirroring Enabled in Your Atrix

0 How To Root Your Motorola Razr XT910

Got A Razr Still Figuring Out How to Root IT Lets follow The Guide Here


STEP1: Go to Settings>>Development Make Sure USB Debugging is On
STEP2:Then Connect Razr To PC Using Micro USB Cable 
STEP3:Then Set USB Mode To None Or Charge Only
STEP4:Make Sure You Have Installed USB Drivers
STEP5:Download Motofail for windows
STEP6:Unzip the Downloaded File
STEP7:After That in The Folder Open "run.bat"
STEP8:After Several Reboots Your Razr Has been Rooted


Congrats now you have rooted Motorola razr XT910


0 MOTOROLA ATRIX 2 GB Lithium Rom

Based on 2.3.6 With ICS like Look


Features Of This Rom

DEODEXED
ZIPALIGNED
BLOAT REMOVED
MOSTLY DEBLURRED
AOSP/CM7 MMS
AOSP/CM7 FILE MANAGER
AOSP BROWSER
AOSP MUSIC
AOSP CALENDAR
AOSP EMAIL
AOSP GALLERY 3D
AOSP CAR/DESK DOCK
GO LAUNCHER
1% BATTERY MOD
BUILD.PROP TWEAKS
SPEED TWEKS
GPS TWEAKS
ICS SLIDERS
ICS SOUNDS
ICS CAMERA
INVERTED SETTINGS, CALENDAR, KEYBOARD
FUGU TWEAKS
BEATS & XLOUD MOD
CWM ON BOOT WITH WORKING GPS
OC TO 1100 USING NEWEST MILESTONE OC
SPEEDY V7 SCRIPTS
NOTIFICATION TOGGLES
CUSTOM CALCULATOR
INVERTED CONTACTS
INVERTED DIALER


How To Install

THIS IS A CWM BACKUP!!!
EXTRACT THE ZIP ON YOUR DESKTOP
MOVE LITHIUM_V1.2 FOLDER TO CLOCKWORKMOD/BACKUP FOLDER
MAKE SURE FOLDER CONTAINS SYSTEM.TAR AND NANDROID
WIPE DATA/FACTORY RESET
WIPE CACHE
WIPE DALVIK
GO TO BACKUP/RESTORE
SELECT RESTORE
SELECT LITHIUM_V1.2
SELECT YES AND ENJOY!

Download Lithium 

Credits To JRW 28@XDA